 +91 98193 84820
 girish.gemerik@gmail.com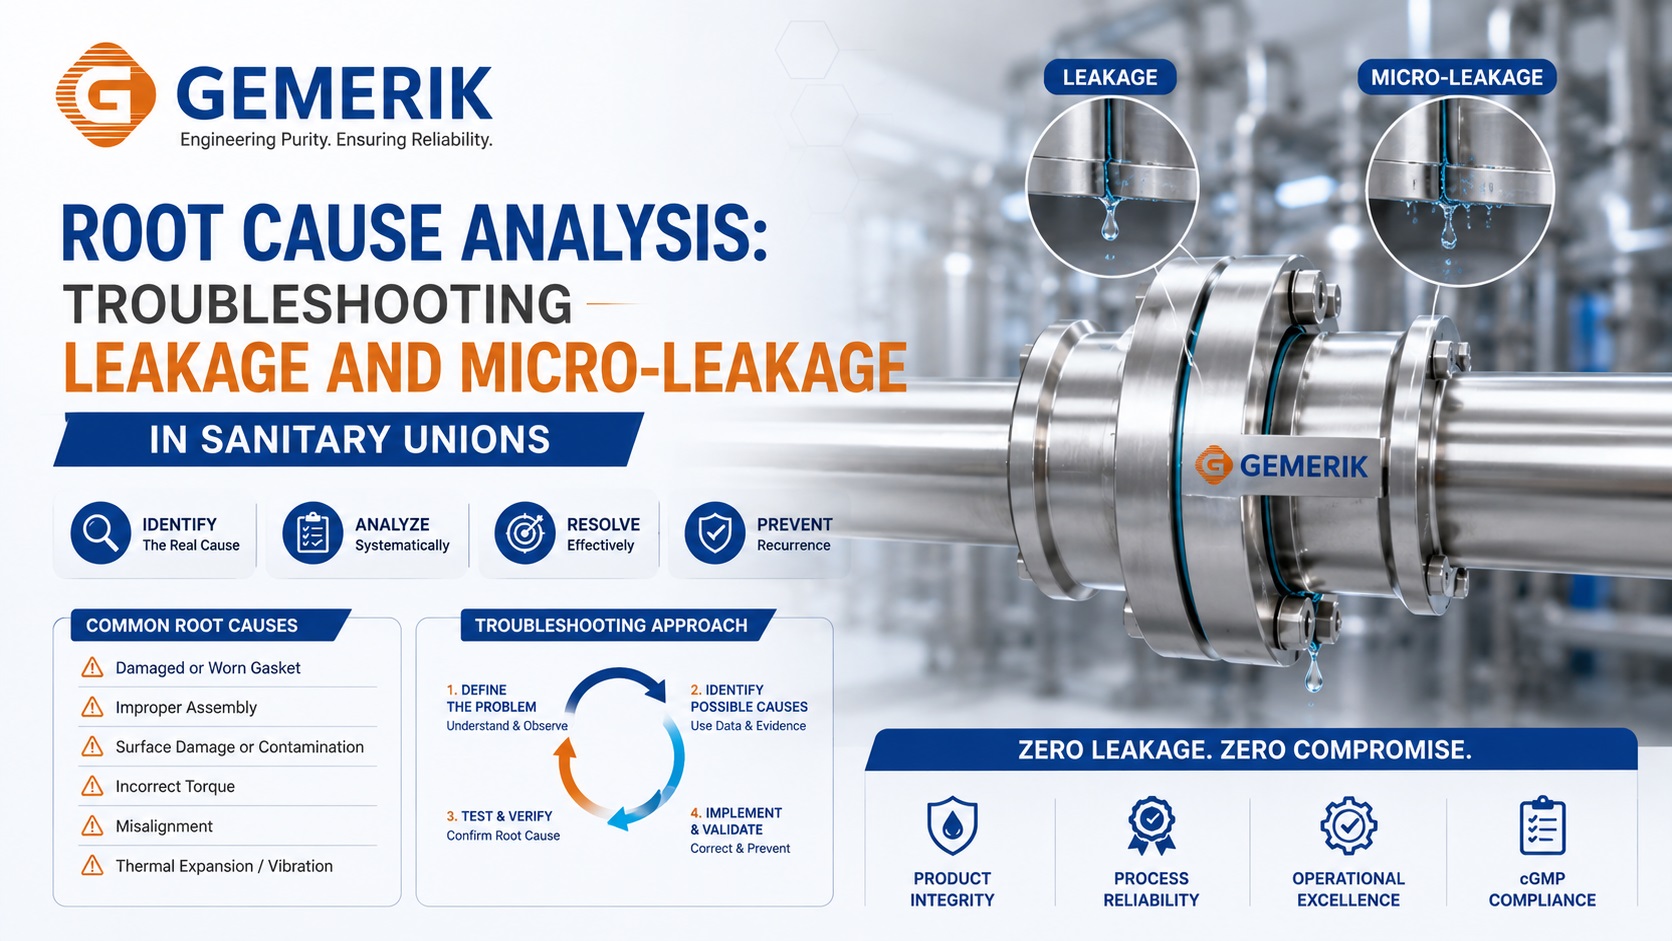
Leakage and micro-leakage in sanitary unions can create serious reliability, hygiene, and process-control concerns in pharmaceutical, biotechnology, food, and other high-purity applications. Because sanitary connections are expected to maintain a cleanable and dependable process boundary, even a small leak should be treated as a potential indication of an underlying assembly, component, alignment, or maintenance issue.
A structured root cause analysis helps engineers move beyond simply tightening a connection or replacing a gasket. The objective is to identify the actual failure mechanism, correct the immediate problem, and prevent recurrence through proper inspection, installation, documentation, and maintenance practices.
1. Start With the Exact Leakage Location
The first step is to determine precisely where the leak originates. Inspect the complete sanitary union assembly rather than assuming that the visible moisture or product residue identifies the failure point. Check the gasket interface, clamp area, ferrule connection, weld transition, and nearby piping or instrument connection.
- External Leakage : Product or process fluid is escaping through the union interface and becoming visible outside the piping system.
- Micro-Leakage : Very small leakage may appear intermittently, as residue, staining, wetness, or a gradual pressure loss rather than as an obvious continuous flow.
- Process-Side Leakage : Leakage may occur only under specific operating conditions such as elevated pressure, temperature, thermal cycling, or cleaning cycles.
2. Common Root Causes of Sanitary Union Leakage
Most sanitary union leakage problems can be traced to a small number of recurring causes. A systematic inspection should consider the gasket, ferrules, clamp, alignment, surface condition, installation practice, and operating conditions together.
- Gasket Damage or Degradation : Cuts, compression damage, chemical attack, ageing, incorrect gasket material, or repeated thermal exposure can reduce sealing performance.
- Incorrect Gasket Installation : A gasket that is twisted, displaced, contaminated, incorrectly seated, or not suitable for the connection can create a leak path.
- Ferrule Misalignment : Poor alignment can prevent uniform compression around the sealing interface and can introduce localized leakage.
- Clamp Problems : Incorrect clamp selection, damaged components, uneven tightening, or insufficient engagement can compromise the union seal.
- Surface Damage : Scratches, dents, corrosion, contamination, or other imperfections on the sealing surfaces can create a path for leakage.
- Thermal and Mechanical Stress : Thermal cycling, vibration, piping loads, and mechanical movement can affect the stability of a sanitary connection over time.
3. Gasket Inspection and Replacement
The gasket should be one of the first components inspected during troubleshooting. Remove the connection using the applicable site procedure and examine the gasket for flattening, cracking, cuts, permanent deformation, discoloration, swelling, contamination, or other signs of deterioration.
If the gasket is damaged or its suitability cannot be confirmed, replace it with the correct approved specification rather than attempting to compensate for the problem by excessive tightening. The replacement gasket should be compatible with the process, cleaning conditions, temperature, pressure, and applicable sanitary requirements.
4. Check Ferrule Alignment and Sealing Surfaces
Proper alignment is essential for uniform sealing. Inspect both mating ferrules and verify that the connection sits squarely without excessive piping stress. The sealing faces should be clean and free from scratches, dents, foreign particles, corrosion, or product deposits.
If a connection repeatedly leaks after gasket replacement, do not assume the gasket is the only cause. Repeated leakage can indicate damaged sealing faces, pipe movement, poor support, misalignment, or an underlying installation issue.
5. Verify Clamp Installation
The clamp must provide the intended mechanical engagement between the mating components. Inspect the clamp for wear, deformation, damage, contamination, and correct fit. Follow the applicable equipment and site procedure for tightening rather than using excessive force as a general troubleshooting method.
- Correct Components : Confirm that the clamp and union components are the correct size and compatible with the installed connection.
- Uniform Engagement : Verify that the clamp is seated correctly and applies the connection force uniformly.
- No Over-Tightening : Excessive tightening should not be used as a substitute for correct component selection, alignment, or gasket installation.
6. Investigate Thermal Cycling and Operating Conditions
A sanitary union may remain leak-free under ambient conditions and show leakage only during operation. Compare the failure timing with process temperature changes, pressure changes, cleaning cycles, sterilization cycles, vibration, and equipment movement.
Thermal expansion and contraction can change the mechanical condition of a connection. If leakage occurs repeatedly after heating or cooling, investigate the complete piping arrangement and support condition rather than focusing only on the union itself.
7. Check for Installation and Piping Stress
Excessive piping stress can transfer load to a sanitary union and reduce sealing reliability. Review pipe supports, alignment, equipment connections, vibration sources, and any movement caused by thermal expansion or contraction.
The connection should not be forced into alignment during assembly. If the piping requires excessive force to bring the union faces together, the root cause may be installation geometry or support arrangement.
8. Micro-Leakage Troubleshooting Checklist
- Identify the exact leak point : Confirm whether the leak is from the gasket interface, clamp, ferrule, weld area, or adjacent component.
- Inspect the gasket : Check material, condition, seating, contamination, compression, and service suitability.
- Inspect ferrules : Check alignment and sealing-face condition for damage or contamination.
- Inspect the clamp : Verify correct size, condition, engagement, and installation.
- Review operating history : Compare leakage with pressure, temperature, cleaning, sterilization, vibration, and maintenance events.
- Review piping support : Check for mechanical loads, misalignment, and thermal movement.
- Document the failure : Record observations, replaced components, operating conditions, corrective action, and verification results.
9. Preventing Recurrence
Corrective action should address the identified root cause rather than only the visible symptom. Establish suitable inspection and replacement practices for gaskets and clamps, maintain clean sealing surfaces, verify installation procedures, and ensure that operators understand the correct assembly method.
For recurring failures, review maintenance history and look for patterns such as repeated leakage at the same location, leakage after a specific process cycle, or failures following equipment modification. This information can help distinguish component failure from system-level design or installation issues.
10. Conclusion
Sanitary union leakage and micro-leakage should be investigated systematically. Gasket condition, ferrule alignment, clamp installation, surface condition, thermal cycling, piping stress, and operating conditions all need to be considered before identifying the final root cause.
A disciplined troubleshooting process helps restore reliable sealing performance while reducing repeated maintenance, unexpected downtime, and the risk of contamination-related process issues. The final corrective action should always follow the applicable equipment specifications, validated procedures, and site quality requirements.